Dynamic Digital Humans Documentation
Unity Tool Initial Setup
This section outlines the steps to import the DDH tools package, importing/exporting avatars, playing avatar animations and exporting to the Oculus Quest using the Unity Engine.
NOTE
For a video tutorial on setting up the DDH tools for Unity, visit the Resources page
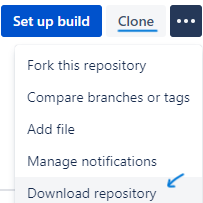
1. Clone or download the DDH Tools Repository
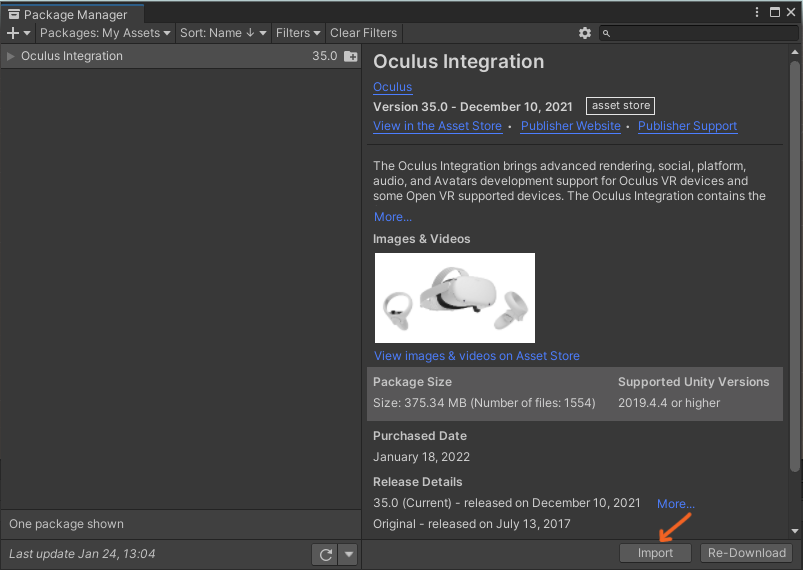
2. Go to Oculus Integration and click Add To My Assets
3. Create a new 3D project in Unity
4. Open the package manager in the editor (Windows->Package Manager)
5. Click the '+' button in the top left corner and choose Add package from disk
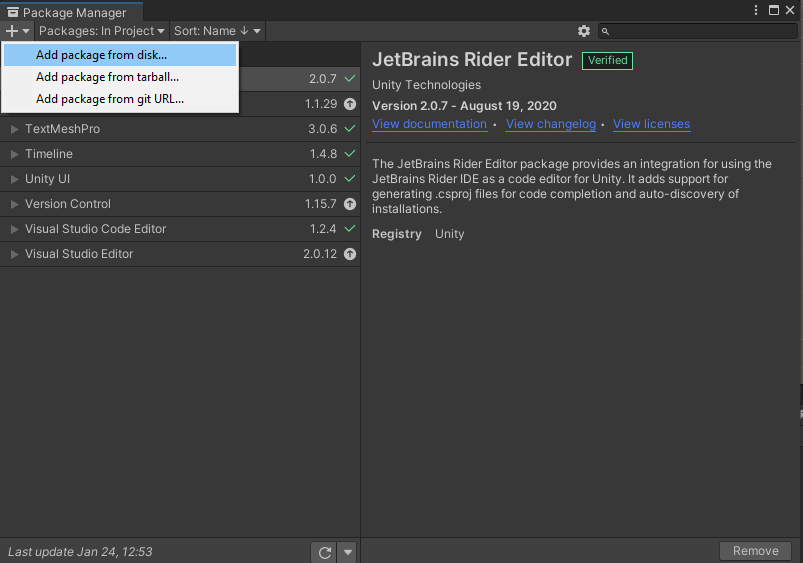
6. Locate the DDH_Tools folder that was cloned/downloaded from the cloud repository and open the package.jsonfile within it.
7. In the package manager window, go to 'Packages: ' drop-down menu in the top left and switch from In Project to My Assets
8. Oculus Integration should be present if step 2 has been completed. Download and import the package.
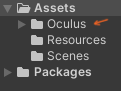
9. If the Oculus Integration package has been successfully imported, an Oculus folder should appear in the Assets folder of the project.
10. In the Unity Editor, go to the menu bar and navigate to Edit->Project Settings->XR Plugin Management and click install. After installation, choose Oculus in both the Desktop and Android tabs.
11. Using the menu bar, navigate to Windows->Package Manager->'Packages: ' drop-down menu and select the Unity Registry option. Search for Universal RP and install it.
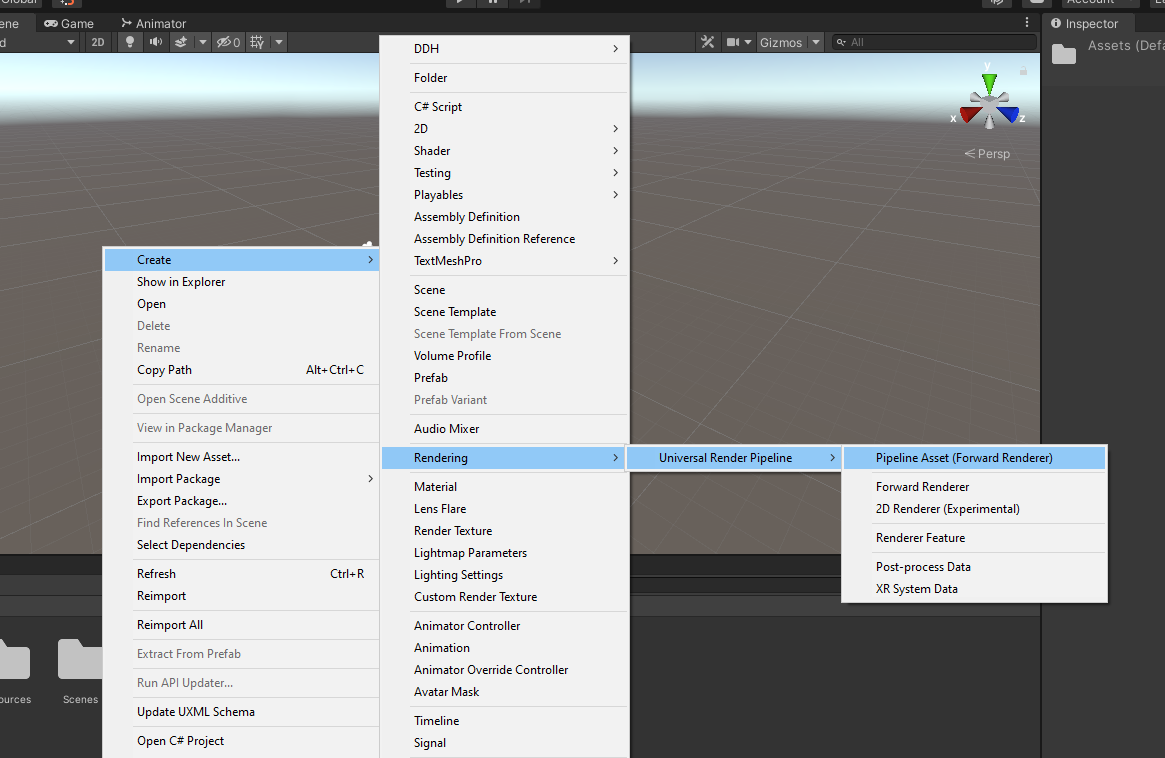
12. Open the Assets folder in the project, right-click in the space, navigate to Create->Rendering->Universal Render Pipeline (URP) and create a Pipeline Asset (Forward Renderer) asset.
13. Using the menu bar, open the project settings (Edit->Project Settings). In the Graphics section, change the Scriptable Render Pipeline Settings from None to URP.
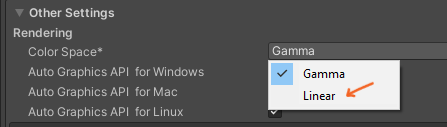
14. In the Player tab of the project settings, navigate to Other Settings->Rendering->Color Space and change the color space from Gamma to Linear